Bathroom tile installation is one of the most impactful upgrades you can make to any home. Whether you are renovating an outdated bathroom or building a new one from scratch, choosing the right tile and installing it correctly can dramatically transform your space. This guide covers everything you need to know about bathroom tile installation, from design planning and material selection to installation techniques and maintenance tips.
Why Bathroom Tile Matters
Tiles are more than just a decorative surface. In bathrooms, tiles serve a functional purpose by protecting walls and floors from moisture, preventing mold growth, and improving durability. A properly executed bathroom tile installation also enhances property value and gives your bathroom a polished, professional look.
Most homeowners focus on two primary areas when installing tile in the bathroom:
- Floor Tile Installation – Ensuring a waterproof, level surface that can withstand daily foot traffic.
- Wall Tile Installation – Particularly in showers and around tubs where water exposure is constant.
Successful bathroom tile installation relies on choosing the right materials, proper preparation, accurate measurements, and careful execution.
Choosing the Right Tile
Before starting a bathroom tile installation, selecting the right type of tile is essential. Not all tiles are created equal, and different materials perform better in specific conditions.
Ceramic Tile
Ceramic tile is one of the most popular choices for bathroom floors and walls. It is affordable, water‑resistant, and available in a wide variety of colors, textures, and sizes. Because ceramic tiles are relatively light and easy to cut, they are ideal for both DIYers and professional installers.
Porcelain Tile
Porcelain tile is denser and more durable than ceramic, making it an excellent choice for high‑moisture areas like showers and bathroom floors. Porcelain resists water absorption better and can handle heavier use. Its strength makes it slightly more challenging to cut, so professional installation may be preferred.
Natural Stone Tile
Options like slate, marble, travertine, and granite bring a luxurious aesthetic to bathroom spaces. However, natural stone is more porous than ceramic or porcelain and often requires sealing to prevent water damage and staining. Natural stone tiles also require more precise installation practices.
Mosaic and Accent Tiles
Mosaic tiles are small tiles mounted on mesh sheets, often used as decorative accents or shower niches. Mosaic can add visual interest and texture, especially when paired with larger primary tiles.
Tile Size and Layout
Tile size is an important design consideration. Large format tiles (such as 12” x 24” or larger) create a modern, seamless look with fewer grout lines, which makes cleaning easier. Smaller tiles and mosaics offer more design flexibility and can be ideal for shower floors where slope and drainage are essential.
In addition to size, consider tile shape and pattern. Classic patterns such as subway, herringbone, or basket weave can elevate the aesthetic of your bathroom tile installation.
Preparing for Tile Installation
Proper preparation ensures a successful bathroom tile installation and prevents future problems like cracking, uneven tiles, or water leaks.
Inspect and Prepare the Subfloor
For bathroom floors, the subfloor must be solid and level. Uneven or weak subfloors can cause tiles to crack over time. Plywood, cement backer board, or tile underlayment systems provide stable surfaces for tile.
If you are removing old tiles, ensure that the subfloor is clean and free of debris. Repair any sagging or squeaky areas before proceeding.
Waterproofing
Waterproofing is a critical step that should never be skipped in bathroom tile installation. Especially in showers, tub surrounds, or wet areas near sinks, a waterproof membrane prevents moisture from penetrating into walls or floors.
Common waterproofing methods include:
- Applying a liquid waterproof membrane over the substrate.
- Installing waterproof backer boards designed for wet areas.
- Sealing seams with waterproof tape or flashing.
Proper waterproofing protects your investment and prevents costly damage later.
Accurate Measurements and Layout
Measure your bathroom area carefully to determine how many tiles you need. Always purchase 10‑15% more tile than your measurements require to allow for cuts, waste, and future repairs.
Mark chalk lines on floors and walls to establish your tile layout before setting any tiles. Planning your layout in advance ensures that your design looks balanced and professional.
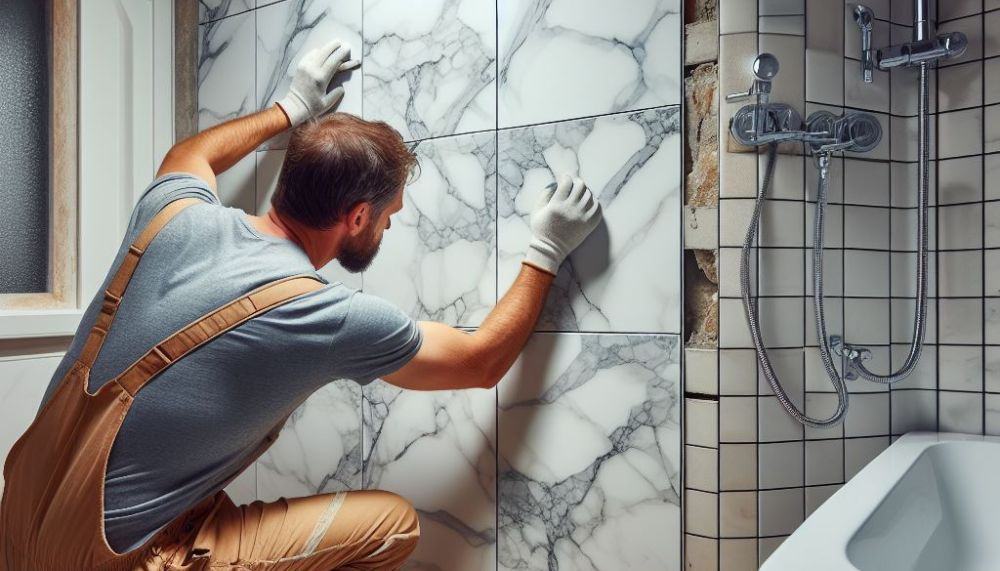
Step‑by‑Step Tile Installation
Whether installing floor tiles or wall tiles, the process follows a structured sequence to achieve the best results.
1. Mix the Thin‑Set Mortar
Thin‑set mortar is the adhesive used to bond tiles to the substrate. Use a notched trowel to apply thin‑set evenly. Choose a modified thin‑set mortar with added polymers for improved bonding.
2. Start Tiling
Begin in the center of the room or from the most visible wall. For shower walls, start at the bottom and work upward.
Press each tile firmly into the thin‑set mortar and twist slightly to ensure a secure bond. Insert tile spacers between tiles to maintain consistent grout lines.
3. Cutting Tiles
Use a wet saw or tile cutter to make clean cuts for edges, corners, and around fixtures. Safety glasses and gloves are highly recommended when cutting tiles.
4. Allow Mortar to Set
After placing all tiles, allow the mortar to cure as per manufacturer instructions—generally 24 hours before grouting.
5. Grouting
Choose a grout type based on tile spacing and location:
- Sanded grout for wider joints (typically greater than 1/8 inch).
- Unsanded grout for narrow joints or polished tiles.
Apply grout with a rubber grout float, pressing it into the spaces between tiles. Wipe excess grout with a damp sponge before it dries.
6. Sealing
Once the grout has cured, apply a grout sealer to protect against moisture and staining. For natural stone tiles, seal both the tiles and grout to enhance water resistance and longevity.
Common Tile Installation Challenges
Even experienced DIYers encounter challenges during bathroom tile installation. Understanding common problems and how to avoid them helps maintain a smooth process.
Uneven Tiles
Uneven tile surfaces can result from an irregular subfloor or incorrect mortar application. Using a leveling system and ensuring a flat substrate can prevent this issue.
Cracked Tiles
Tiles may crack if the subfloor shifts or if thin‑set mortar wasn’t applied evenly. Proper preparation and using quality materials reduce the risk of cracking.
Grout Haze
A cloudy film of grout haze can form over tiles if grout is not wiped off promptly. Use a grout haze remover to clean any residue.
Water Leaks
Inadequate waterproofing is the leading cause of tile failures in wet areas. Always invest in proven waterproofing membranes and follow manufacturer recommendations.
Tips for Stylish Bathroom Tile Design
A bathroom tile installation is also an opportunity to showcase great design. Consider these tips:
- Pair neutral floor tiles with bold wall tiles for balance.
- Use vertical subway tile layout to make small bathrooms look taller.
- Create a feature wall behind vanities or in showers.
- Blend textures, such as matte floor tiles with glossy wall tiles, for visual depth.
Lighting also plays an important role. Well‑placed lights highlight tile patterns and create a welcoming ambiance.
Hiring a Professional vs. DIY
Deciding whether to install bathroom tile yourself or hire a professional depends on your skill level, budget, and comfort with tools.
DIY Advantages:
- Lower labor cost
- Personal control over the project
- Satisfaction from completing a hands‑on job
Professional Advantages:
- Expert surface preparation and waterproofing
- Precise cuts and layout
- Faster installation time
- Warranty on workmanship
Many homeowners choose to tackle small projects themselves, like installing new floor tiles or a simple backsplash. Larger projects, especially wet area walls in showers or complex patterns, often benefit from a professional installer’s expertise.
Maintenance After Installation
Once your bathroom tile installation is complete, proper maintenance keeps your surfaces fresh and long‑lasting.
- Clean tiles regularly with a neutral cleaner.
- Avoid harsh chemicals that damage grout or stone finish.
- Inspect grout annually and re‑seal if necessary.
- Address cracked or chipped tiles promptly to prevent water infiltration.
Final Thoughts
Bathroom tile installation is a combination of function and design. With the right planning, materials, and installation techniques, you can create a bathroom space that’s beautiful, durable, and easy to maintain.
From selecting ceramic or porcelain tiles to mastering layout and grout application, each step matters. Whether you choose to DIY or hire a professional, understanding the fundamentals of bathroom tile installation ensures a successful and rewarding project.
If you are planning a bathroom renovation or new construction, start with smart tile selection and thorough preparation. Quality installation today means years of comfort and satisfaction in your bathroom space.
Leave a Reply